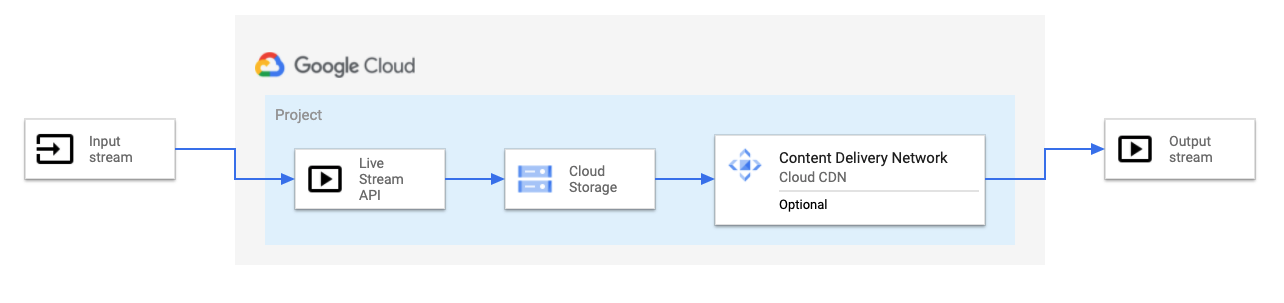
Google Cloud 直播服务 Live Stream API 已经在2022年6月 GA。用户可以使用这个托管服务创建和管理直播流,并利用谷歌的全球高速网络,向各地的主播和观众提供高质量的推流和拉流体验。这个服务主要包含 RTMP 推流、直播转码、HLS 或 MPEG-DASH 切片等功能,可以将转码后的流媒体文件输出到 Google Cloud 存储桶,通过 Google Cloud CDN 来下载播放。本文通过一个示例,介绍如何使用该服务,搭建一个直播流。
创建直播频道
测试直播流
给直播拉流配置 CDN 加速
参考资料
创建直播频道
首先用 gcloud 命令开启直播服务。
gcloud services enable livestream.googleapis.com |
后面的所有 API 调用都需要使用一个服务账号鉴权。可以给用到的服务账号配置以下角色。
Live Stream > Live Stream Editor
根据测试需要,配置以下环境变量,主要用于后面创建的各个资源的命名。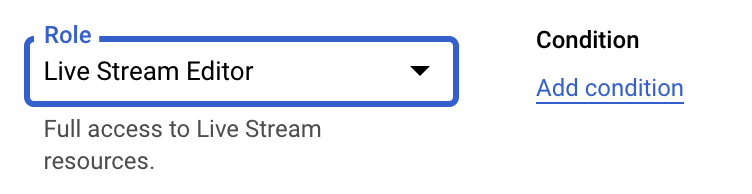
PROJECT_ID=youzhi-lab
LOCATION=asia-east2
INPUT_ID=input-endpoint-hkg-1
CHANNEL_ID=channel-hkg-1
BUCKET=hk-publish |
创建 Google Cloud 对象存储桶,用来存放直播流转码后的切片和播放列表文件。
gsutil mb -l $LOCATION gs://$BUCKET |
创建一个直播推流端点,即 Input Endpoint。注意调用时用到了一个配置文件,里面注明了推流类型为 RTMP。
cat > create_input_request.json << 'EOF'
{
"type": "RTMP_PUSH"
}
EOF
curl -X POST \\
-H "Authorization: Bearer "$(gcloud auth application-default print-access-token) \\
-H "Content-Type: application/json; charset=utf-8" \\
-d @create_input_request.json \\
"https://livestream.googleapis.com/v1/projects/$PROJECT_ID/locations/$LOCATION/inputs?inputId=$INPUT_ID"
返回结果:
{
"name": "projects/youzhi-lab/locations/asia-east2/operations/operation-1656396606764-5e27be35a73ec-f31fccba-e3fb0a0b",
"metadata": {
"@type": "type.googleapis.com/google.cloud.video.livestream.v1.OperationMetadata",
"createTime": "2022-06-28T06:10:08.232687431Z",
"target": "projects/youzhi-lab/locations/asia-east2/inputs/input-endpoint-hkg-1",
"verb": "create",
"requestedCancellation": false,
"apiVersion": "v1"
},
"done": false
} |
上面和下面的一些操作是异步操作,可以用 Operations API 来查看其完成状态。
curl -X GET \\
-H "Authorization: Bearer "$(gcloud auth application-default print-access-token) \\
"https://livestream.googleapis.com/v1/projects/youzhi-lab/locations/asia-east2/operations/operation-1656396606764-5e27be35a73ec-f31fccba-e3fb0a0b"
{
"name": "projects/youzhi-lab/locations/asia-east2/operations/operation-1656396606764-5e27be35a73ec-f31fccba-e3fb0a0b",
"metadata": {
"@type": "type.googleapis.com/google.cloud.video.livestream.v1.OperationMetadata",
"createTime": "2022-06-28T06:10:08.232687431Z",
"target": "projects/youzhi-lab/locations/asia-east2/inputs/input-endpoint-hkg-1,
"verb": "create",
"requestedCancellation": false,
"apiVersion": "v1"
},
"done": false
} |
创建一个直播频道(Channel)配置文件。其中包含了输入端点、输出存储桶以及转码配置等信息。
cat > create_channel_request.json << EOF
{
"inputAttachments": [
{
"key": "my-input",
"input": "projects/$PROJECT_ID/locations/$LOCATION/inputs/$INPUT_ID"
}
],
"output": {
"uri": "gs://$BUCKET"
},
"elementaryStreams": [
{
"key": "es_video_high",
"videoStream": {
"h264": {
"profile": "high",
"widthPixels": 1280,
"heightPixels": 720,
"bitrateBps": 3000000,
"frameRate": 30
}
}
},
{
"key": "es_video_main",
"videoStream": {
"h264": {
"profile": "main",
"widthPixels": 480,
"heightPixels": 270,
"bitrateBps": 300000,
"frameRate": 30
}
}
},
{
"key": "es_audio",
"audioStream": {
"codec": "aac",
"channelCount": 2,
"bitrateBps": 160000
}
}
],
"muxStreams": [
{
"key": "mux_video_hd_ts",
"container": "ts",
"elementaryStreams": ["es_video_high", "es_audio"],
"segmentSettings": { "segmentDuration": "2s" }
},
{
"key": "mux_video_sd_ts",
"container": "ts",
"elementaryStreams": ["es_video_main", "es_audio"],
"segmentSettings": { "segmentDuration": "2s" }
}
],
"manifests": [
{
"fileName": "main.m3u8",
"type": "HLS",
"muxStreams": [
"mux_video_hd_ts",
"mux_video_sd_ts"
],
"maxSegmentCount": 5
}
]
}
EOF |
创建直播频道,使用上面的配置文件。
curl -X POST \\
-H "Authorization: Bearer "$(gcloud auth application-default print-access-token) \\
-H "Content-Type: application/json; charset=utf-8" \\
-d @create_channel_request.json \\
"https://livestream.googleapis.com/v1/projects/$PROJECT_ID/locations/$LOCATION/channels?channelId=$CHANNEL_ID" |
可以通过 Operations 接口查询创建进度,在完成后,可以启动频道。
curl -X POST \\
-H "Authorization: Bearer "$(gcloud auth application-default print-access-token) \\
-H "Content-Type: application/json; charset=utf-8" \\
-d "" \\
"https://livestream.googleapis.com/v1/projects/$PROJECT_ID/locations/$LOCATION/channels/$CHANNEL_ID:start" |
如果调用成功,直播频道已经准备就绪,可以开始推流和拉流了。
注意,如果上面调用返回如下的404错误,可以尝试在控制台 Cloud Shell 里执行一遍。如果 Cloud Shell 里不报错,则有可能是本地环境的防火墙或者 VPN 网关导致的错误。 <p>The requested URL<code>/v1/projects/youzhi-lab/locations/asia-east2/channels/channel-hkg-1</code> was not found on this server.
|
测试直播流
首先查询推流端点地址,可以用 inputs 接口列表一下现有的输入端点,找到刚刚创建的推流输入端点。
curl -X GET \\
-H "Authorization: Bearer "$(gcloud auth application-default print-access-token) \\
-H "Content-Type: application/json; charset=utf-8" \\
"https://livestream.googleapis.com/v1/projects/$PROJECT_ID/locations/$LOCATION/inputs"
输出:
{
"inputs": [
{
"name": "projects/youzhi-lab/locations/asia-east2/inputs/input-endpoint-hkg-1",
"createTime": "2022-06-28T06:10:08.229369763Z",
"updateTime": "2022-06-28T06:12:29.642499099Z",
"type": "RTMP_PUSH",
"uri": "rtmp://34.96.142.152/live/e559cc2c-9fce-4d4b-ab13-3e72fa356af9",
"tier": "HD"
}
]
} |
返回的内容中的“uri”字段即为推流的地址,是一个标准的 RTMP 地址。
我们使用 ffmpeg 来推一个测试流到该地址。
INPUT_STREAM_URI=rtmp://34.96.142.152/live/e559cc2c-9fce-4d4b-ab13-3e72fa356af9
ffmpeg -re -f lavfi \\ -i "testsrc=size=1280x720 [out0]; sine=frequency=500 [out1]" \\
-acodec aac -vcodec h264 -f flv $INPUT_STREAM_URI |
如果 ffmpeg 执行不报错,等待几秒,可以看到存储桶中增加了 main.m3u8 文件,以及两个子目录,分别存放了两个不同码率的转码输出切片和播放列表。每个子目录里保留最新的35个(70秒)切片文件,更老的切片文件会被自动删除。为了能让外部播放器能播放这些文件,需要将存储桶设为公开可访问,并且配置跨域规则。
gsutil iam ch allUsers:objectViewer gs://$BUCKET
cat > cors.json << 'EOF'
[
{
"origin": ["https://shaka-player-demo.appspot.com/"],
"responseHeader": ["Content-Type", "Range"],
"method": ["GET", "HEAD"],
"maxAgeSeconds": 86400
}
]
EOF
gsutil cors set cors.json gs://$BUCKET |
此时可以把存储桶根目录的 main.m3u8 文件公开访问地址拷贝下来,在 HLS 播放器中播放。比如
https://storage.googleapis.com/hk-publish/main.m3u8
在浏览器里常用的 HLS 播放器包括 Shaka 播放器 Native HLS Player 播放器。
https://shaka-player-demo.appspot.com/
https://chrome.google.com/webstore/detail/native-hls-playback/emnphkkblegpebimobpbekeedfgemhof
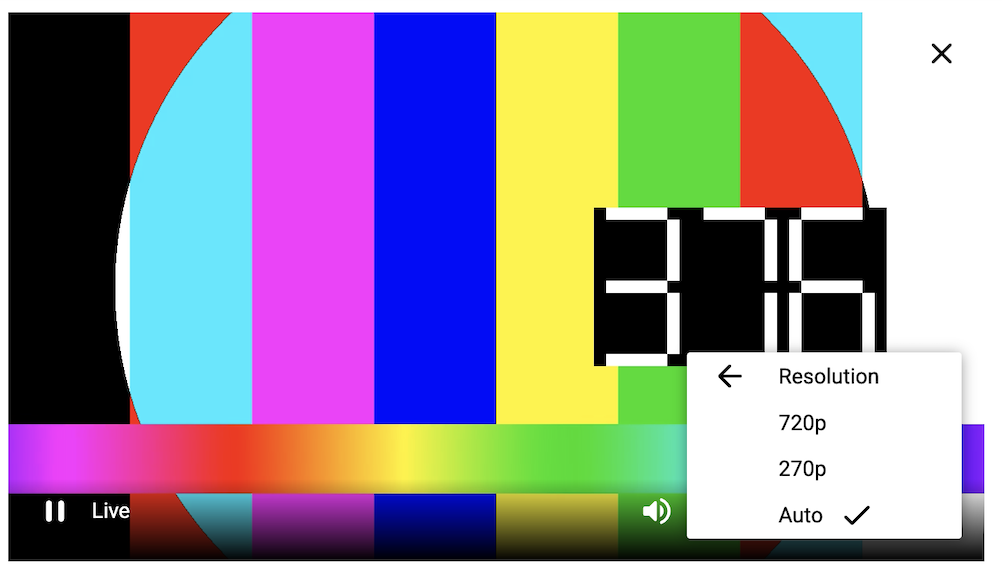
下面是该测试流在 Shaka 播放器中的播放画面。可以看到码率选择中有720P 和270P 两个码率,支持自适应码率选择或者手动选择。这与频道配置的转码配置一致。
 如果要用第三方推流软件,比如 OBS 来推流,可以在推流配置中输入推流地址,注意 Stream Key 要输入推流地址中 live 字段后面的 UUID。

给直播拉流配置 CDN 加速
为了给直播流观看加速,可以配置 Cloud CDN,在边缘节点缓存直播切片,并将其源站指向直播转码输出存储桶。注意我们配置了直播流每2秒生成一个新切片,所以直播的播放列表文件应该不缓存,或者缓存 TTL 不超过2秒。而切片文件可以缓存更长时间。在下面的 CDN 配置里,缓存配置是遵循源站,即 GCS 默认配置。在默认配置中,播放列表的缓存标头是 no-store,而切片 TS 文件的缓存 TTL 是3600秒。
gcloud compute backend-buckets create backend-bucket-$BUCKET \\
--gcs-bucket-name=$BUCKET \\
--enable-cdn \\
--cache-mode=USE_ORIGIN_HEADERS
gcloud compute url-maps create http-lb-$BUCKET \\
--default-backend-bucket=backend-bucket-$BUCKET
gcloud compute target-http-proxies create http-lb-proxy-$BUCKET \\
--url-map=http-lb-$BUCKET
gcloud compute forwarding-rules create http-lb-forwarding-rule-$BUCKET \\
--load-balancing-scheme=EXTERNAL \\
--network-tier=PREMIUM \\
--global \\
--target-http-proxy=http-lb-proxy-$BUCKET \\
--ports=80 |
配置完成后,可以获取 Cloud CDN 的访问地址。
gcloud compute forwarding-rules describe http-lb-forwarding-rule-$BUCKET --global
输出:
IPAddress: 34.160.246.50
IPProtocol: TCP
creationTimestamp: '2022-07-05T19:28:47.026-07:00'
description: ''
... |
可以通过以下地址来播放直播流。
http://34.160.246.50/main.m3u8
参考资料
[1] Overview of the Live Stream API
[2] Live Stream API Reference
[3] Live Stream API Locations