首页 > 资源 > 文章详情
使用 GKE Connect 管理微软 AKS 服务
Google Cloud 在 Next 19 大会上发布了 Anthos,这项服务可以在云端实现对 Kubernetes集群的管理,可用于企业的私有部署,或者其他的公有云比如 AWS 和 Azure 上。使用 Anthos ,能够通过这一个端口实现所有的 Kubernetes 集群的管理。
这篇文章将会介绍如何实现这些功能。
1 启用服务
在使用该功能之前,需要确保启用了 Google Cloud 的相关功能。下面这些 Gcloud 的命令可以开启这些服务。
gcloud services enable
–project=[project-name]
cloudresourcemanager.googleapis.com
container.googleapis.com
gkeconnect.googleapis.com
gkehub.googleapis.com
serviceusage.googleapis.com
2 创建服务账户和 IAM 授权
2.1 创建服务账号
Using Gcloud command to create a service account:
使用如下 Gcloud 命令创建账户:
gcloud iam service-accounts create anthos-connect
2.2 IAM 授权
Using the following command to do IAM authorization:
使用如下命令行完成 IAM 授权:
gcloud projects add-iam-policy-binding
hengwei-project01
–member=“serviceAccount:anthos-connect@hengwei-project01.iam.gserviceaccount.com”
–role=“roles/gkehub.admin”
gcloud projects add-iam-policy-binding
hengwei-project01
–member=“serviceAccount:anthos-connect@hengwei-project01.iam.gserviceaccount.com”
–role=“roles/serviceusage.serviceUsageViewer”
gcloud projects add-iam-policy-binding
hengwei-project01
–member=“serviceAccount:anthos-connect@hengwei-project01.iam.gserviceaccount.com”
–role="roles/gkehub.connect
2.3 创建服务账户秘钥
Using following command to create the Service Account key:
使用以下命令创建秘钥:
gcloud iam service-accounts keys create sa-key.json
–iam-account=anthos-connect@hengwei-project01.iam.gserviceaccount.com
–key-file-type=json
3. 在微软 Azure 上创建 AKS 服务
3.1 创建 AKS cluster
On Azure Portal, chose All Services -> Compute -> Kubernetes:
在 Azure 网页上,选择 All Services -> Compute -> Kubernetes:
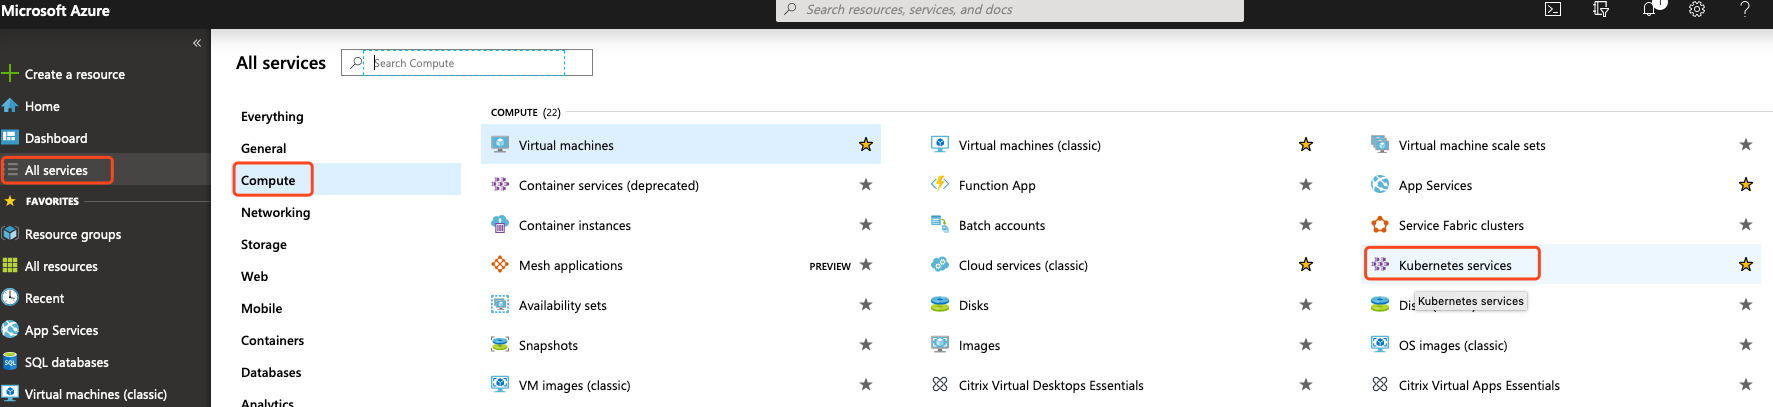
Click add to create a new AKS cluster:
点击添加 (add )以创建一个新的 AKS cluster:
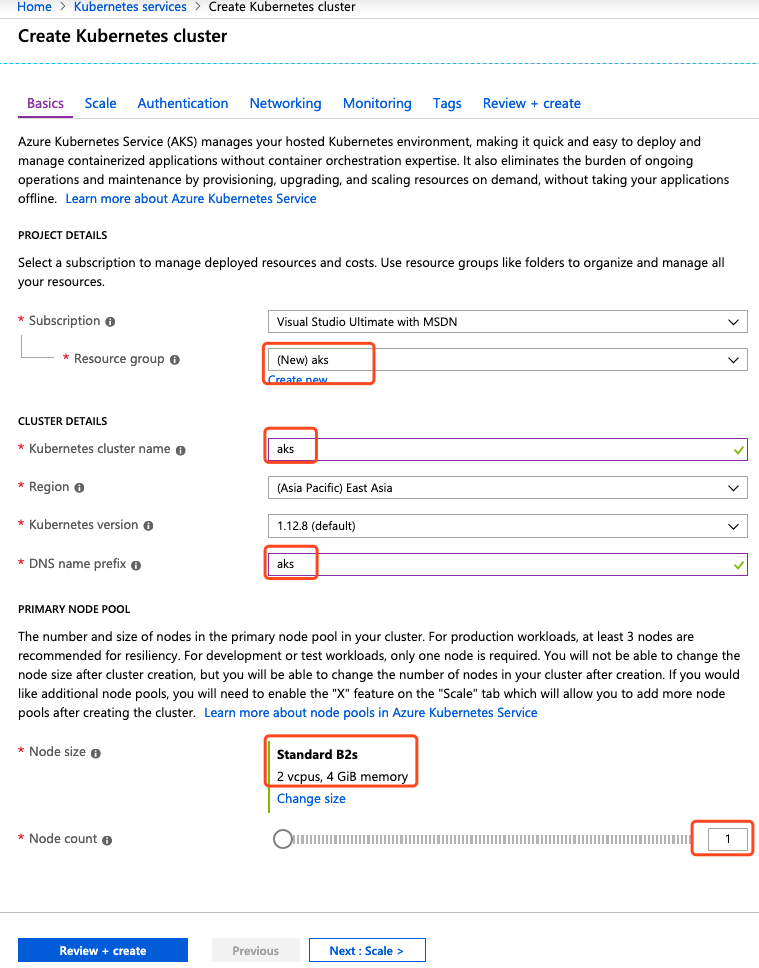
然后点击 Review+create完成 AKS cluster 的创建。
3.2 使用 Kubectl 连接到 AKS cluster
3.2.1 打开 Cloud Shell

3.2.2 配置 kubectl
使用 bash 命令配置 kubectl:

之后,可以使用 kubectl 命令得到 cluster 的具体信息:

4.将 kubernetes cluster 注册到 Anthos
项目中添加完白名单后,在 Kubernetes Engine 页面上,有一个新增的按钮:REGISTER CLUSTER.

点击这个按钮,完成 Azure 上的 AKS cluster 注册。
4.1 配置
在配置页面,输入集群的名字为 aks , 并将服务帐户的密钥以 Json 格式粘贴到服务帐户密钥字段中:
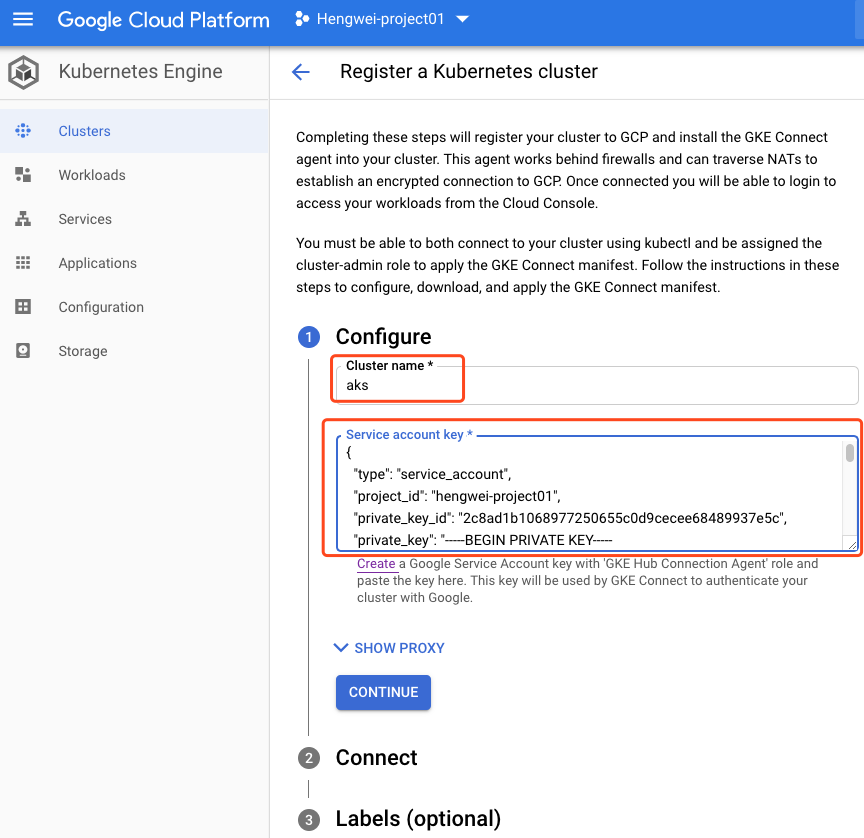
点击 CONTINUE 继续
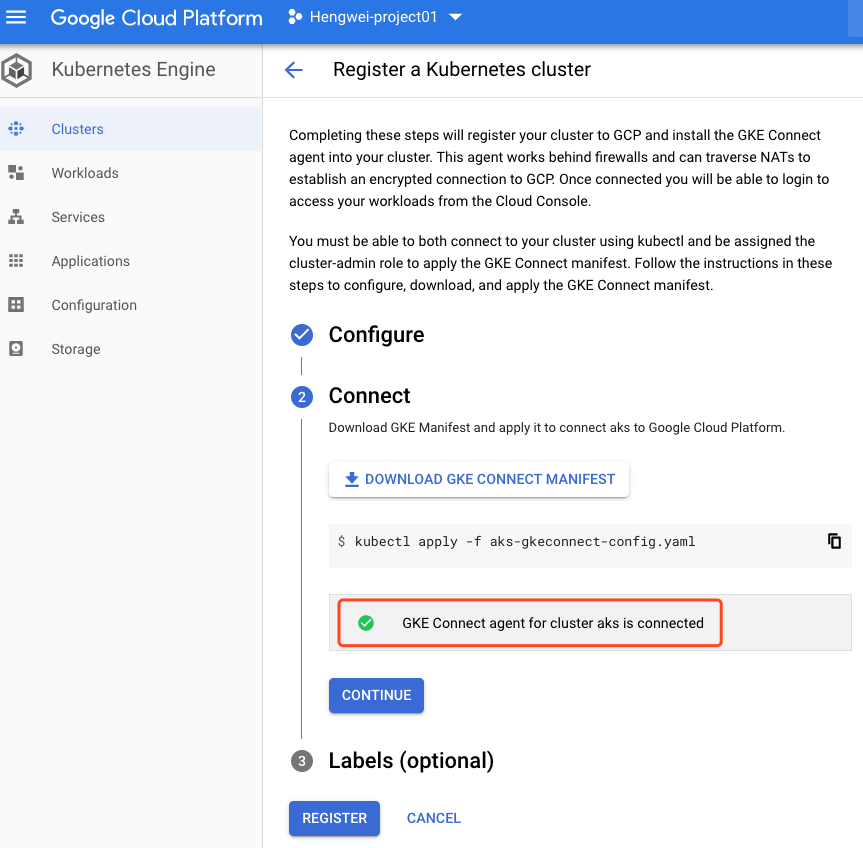
4.2 连接

将 GKE 连接 MINIFEST 下载到本地,粘贴到 Azure 云的 shell, 并将此 yaml 文件部署到 AKS 集群以创建名称空间,集群角色绑定,以及配置映射和部署。
kubectl 命令是:
kubectl apply -f aks-gkeconnect-config.yaml

可以找到为 GKE 连接的两个端口:
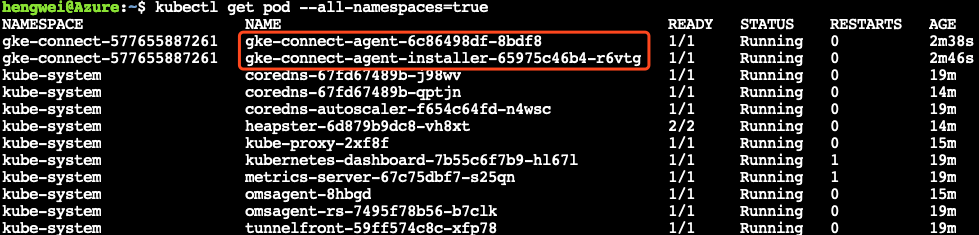
回到 Google Cloud 控制界面,可以发现集群已经实现了连接:
4.3 标记
标记位置和提供者:
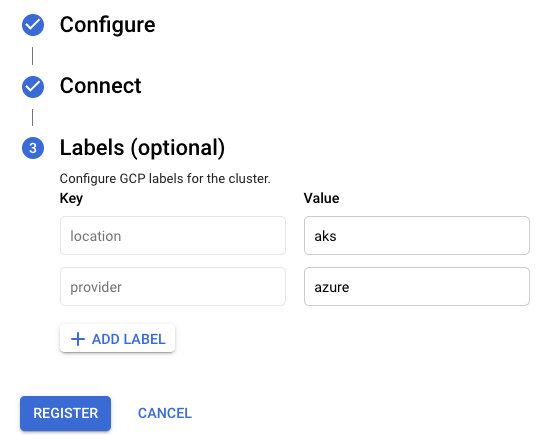
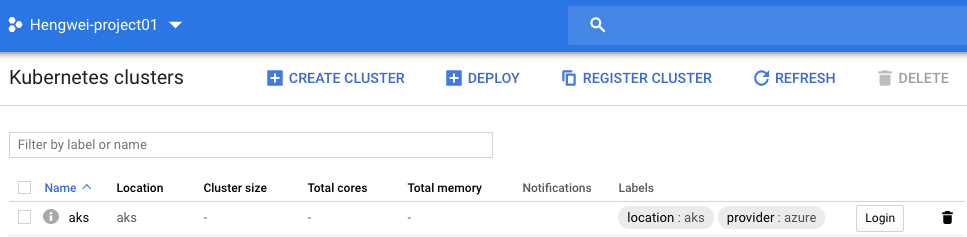
点击完 REGISTER 按钮,cluster 就被编入到了 Anthos:
5 登录到 AKS
5.1 在 AKS 集群 中创建服务账户
为了获得 AKS 的特权,我们需要用以下命令,创建 AKS 服务帐户来实现:
kubectl create serviceaccount my-ksa
kubectl create clusterrolebinding my-view-binding
–clusterrole view --serviceaccount default:my-ksa
kubectl create clusterrolebinding my-node-reader-binding
–clusterrole node-reader --serviceaccount default:my-ksa
kubectl create clusterrolebinding my-cluster-admin-binding
–clusterrole cluster-admin --serviceaccount default:my-ksa
SECRET_NAME=(kubectl get serviceaccount my-ksa -o jsonpath=’{.secrets[0].name}’)
kubectl get secret {SECRET_NAME} -o jsonpath=’{.data.token}’ | base64 -d
使用以下命令得到令牌:

复制得到的令牌。
5.2 输入令牌登录 AKS 集群
在 Google Cloud 上,点击登录(login):
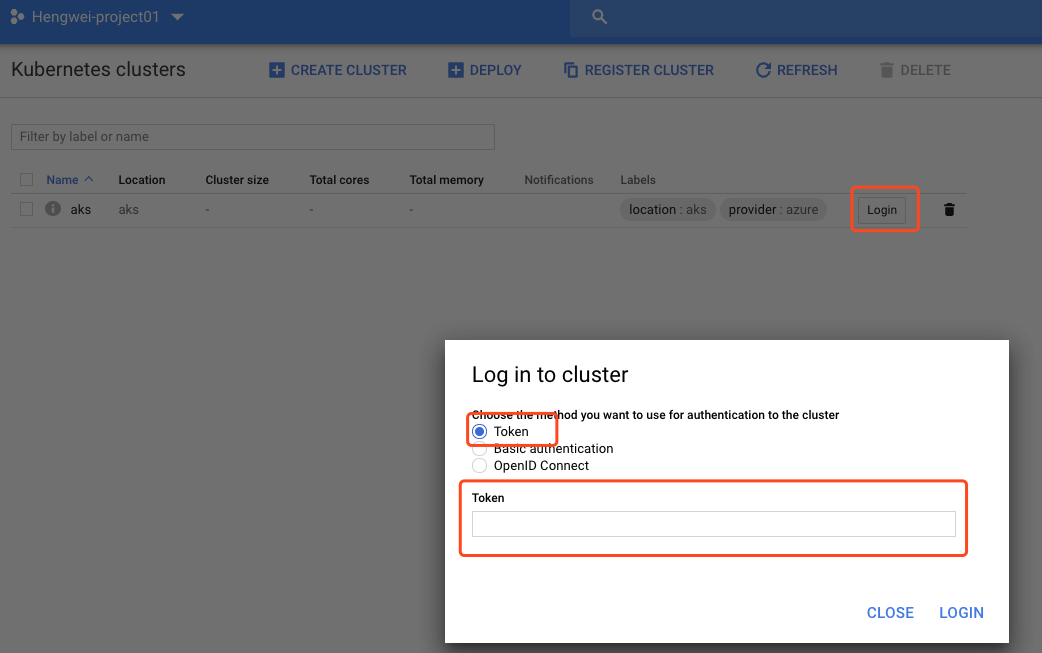
使用 Token 模式,并粘贴上一步得到的令牌:
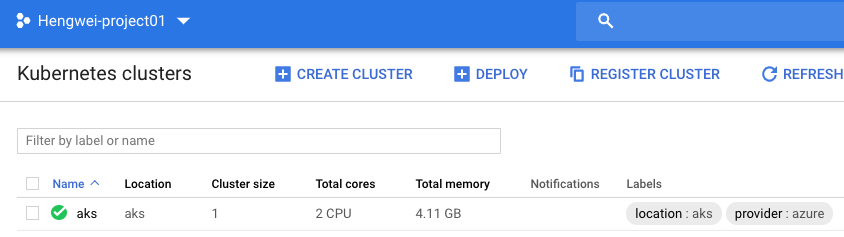
之后,就可以看到 AKS 集群在线。
6.测试
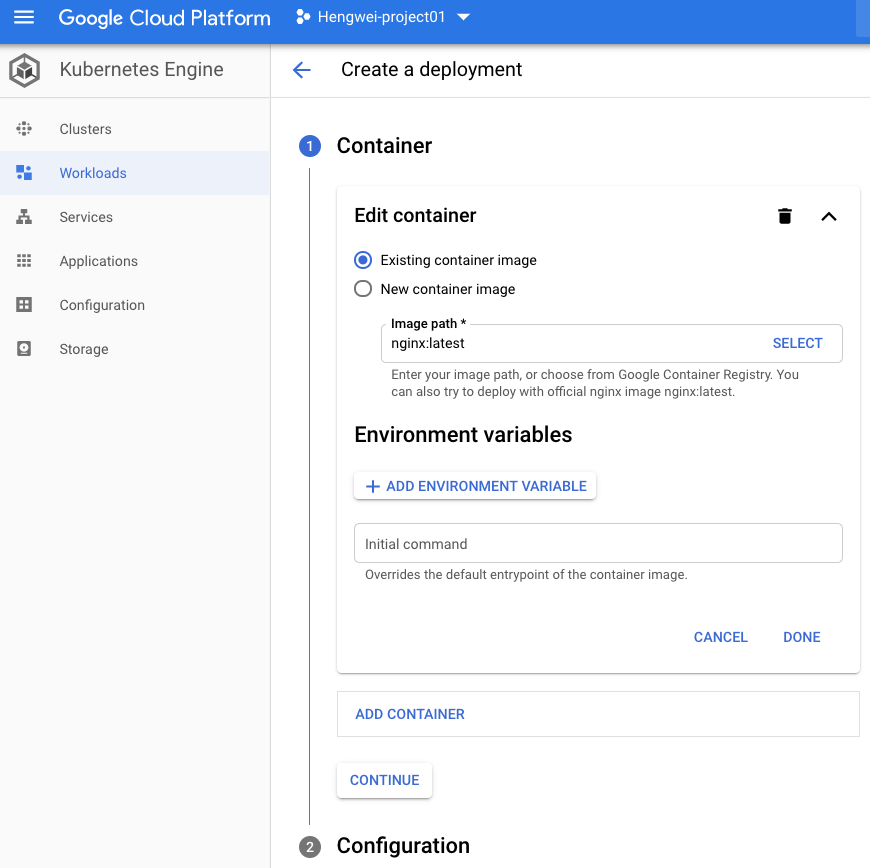
6.1创建部署
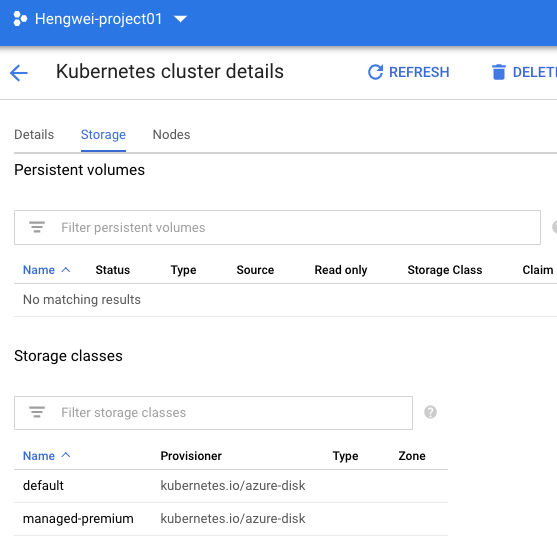
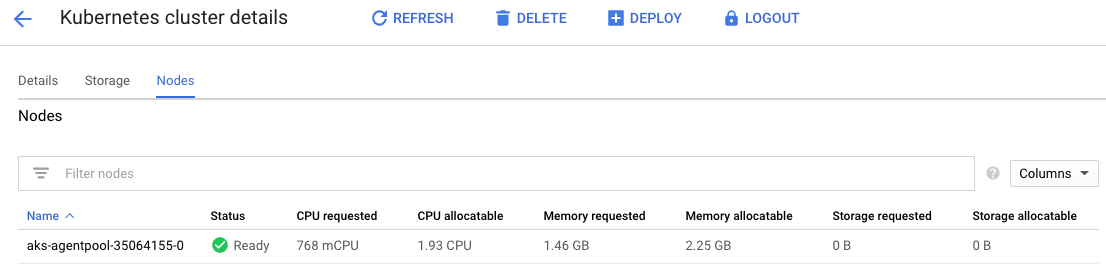
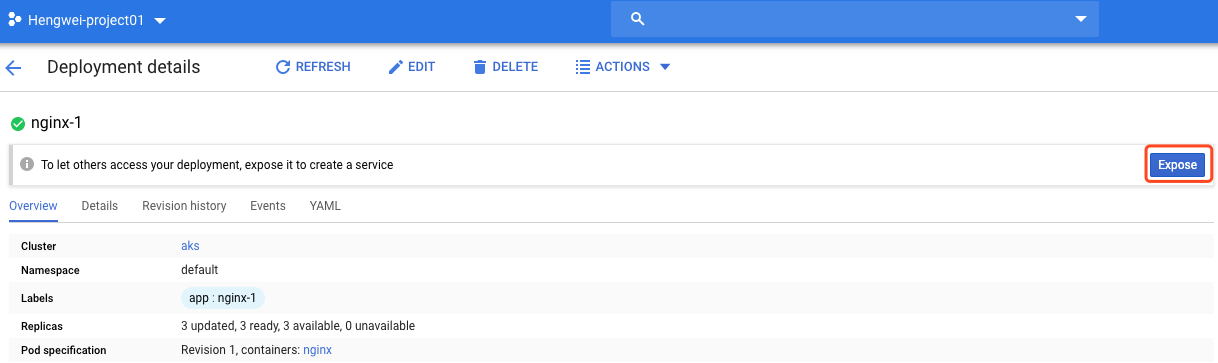
我们可以查看 AKS 集群的详细信息:

创建一个部署:
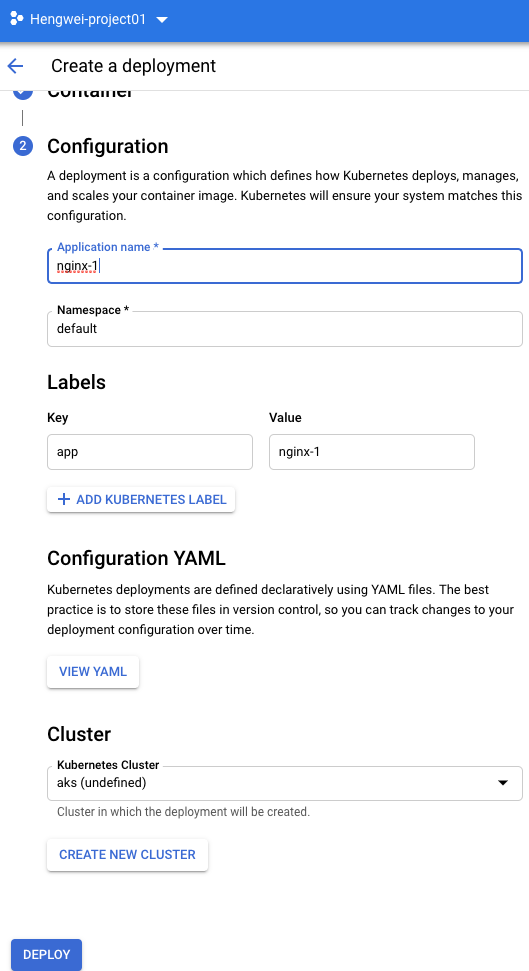
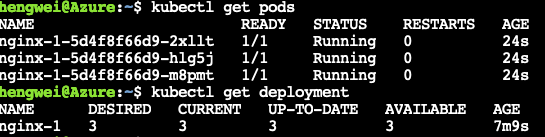
然后,我们可以看到相关的信息:
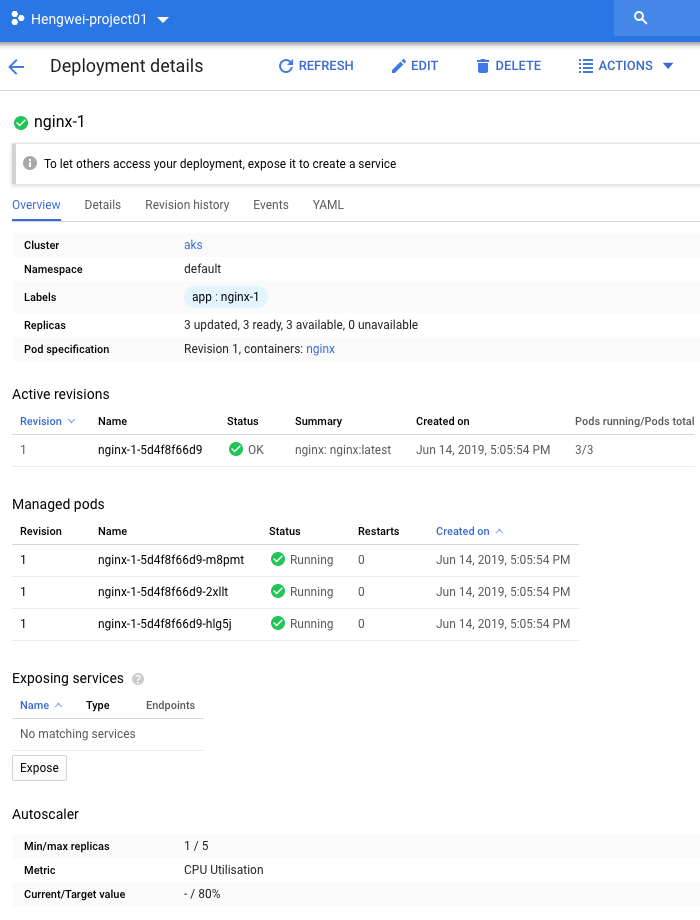
通过 AKS,我们也可以得到一些相关的信息:
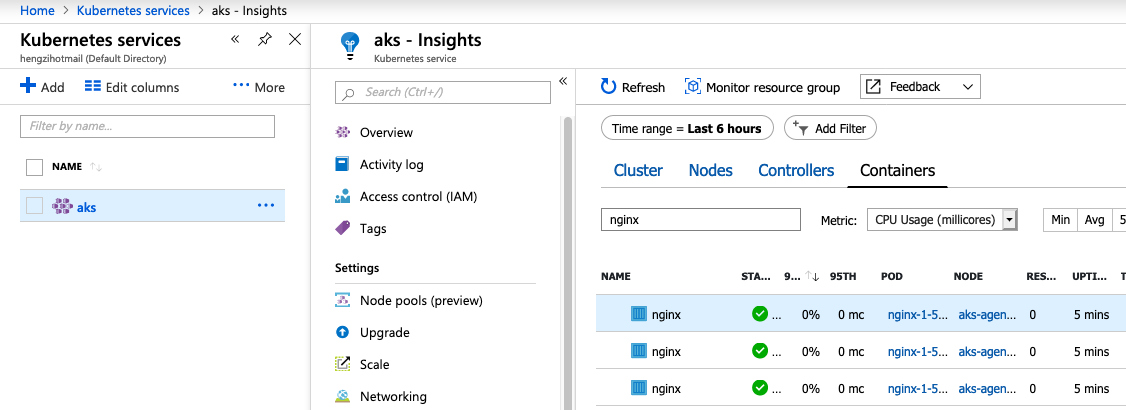
也可以通过 kubectl CLI 命令来实现:
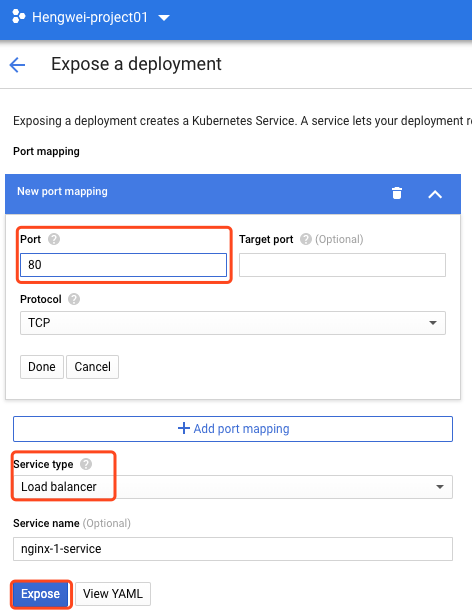
6.2 公开部署
使用 GKE 接口公开 nginx 部署,并利用 LoadBalancer 创建一项服务:
将会看到 AKS 使用 Azure Server 负载均衡器创建服务:
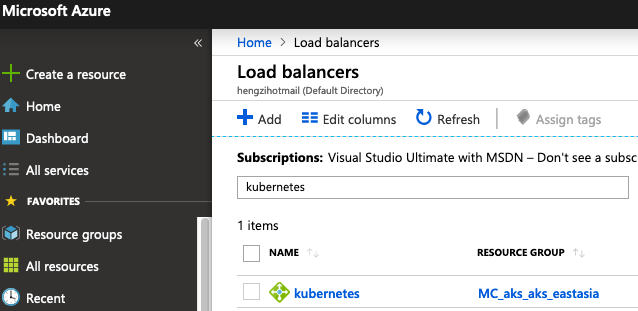
Using the SLB IP address:

这样就可以访问 Nginx 的欢迎界面了:
7 总结
Anthos 是 Kubernetes 的混合产品。使用它可以集中管理 Kubernetes 集群 ,包括本地和公共云上的 Kubernetes 服务。
文章版权归作者所有,未经许可不得转载。
文章信息
相关推荐
精选内容

关注【谷歌云服务】
微信公众号
微信公众号
微信咨询:
周一至周五 早上 9 点到晚上 6 点
联系我们