首页 > 资源 > 文章详情
使用 GCP certificate manager 管理您的网站域名证书
目录
2. 配置 HTTP/HTTPS Load Balancer
使用 DNS Authorization 创建 Certificate
背景
Google Cloud 证书管理器(Certificate Manger) 用来签发和管理 SSL 证书,并配合 HTTPS 负载均衡器使用。更多信息:https://cloud.google.com/certificate-manager/docs/overview
对比于现有 SSL 使用方式,使用证书管理器有以下优势:
支持 Google 签发证书的自动更新
支持泛域名证书
支持基于 DNS 的域名验证
基于主机名 hostname 进行证书选择
解除了单一负载均衡器15个证书的限制
使用场景
1、先前通过 GCP Managed Certificate 创建证书,往往需要很长时间,这样造成在更新域名或子域名证书时需要较长的停机时间,使用 Certificate Manager 可以提前创建好证书,然后挂载到相应的 Target HTTPS Proxy 上,大大缩短了停机时间。
2、当你的业务需要许多后端服务,同时这些服务需要使用不同的域名来发布时,可以通过使用 Certificate Manager 来动态更新证书。
在本实验中,我们将创建一个 GKE 集群,在上面部署两个不同的服务:home 和 hello 服务,并通过 HTTPS 负载均衡器对外发布。在 URL Map 中,使用 home 和 hello 两个 hostname 路由映射到不同的后端 Backend Services。通过证书管理器 Certificate Manager,针对 home 和 hello 分别生成两个独立的证书,并绑定到 Target HTTPS Proxy 上,最终通过统一的一个 IP 地址对外发布。
1. 准备 GKE 集群和部署工作负载
创建 GKE 集群
创建 Deployment
创建 Service
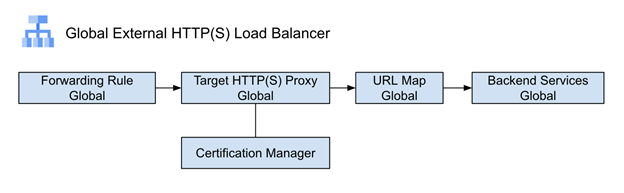
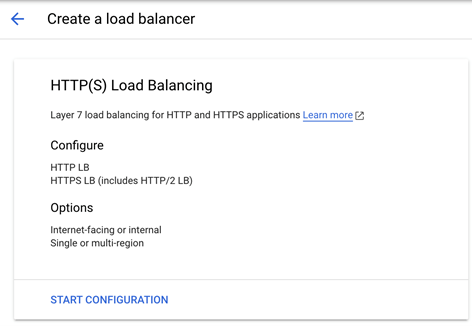
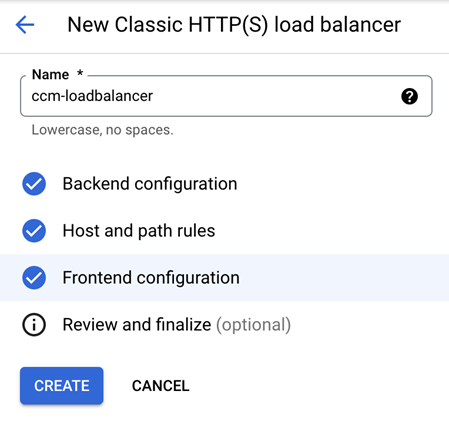
2. 配置 HTTP/HTTPS Load Balancer
创建 HTTP Load Balancer
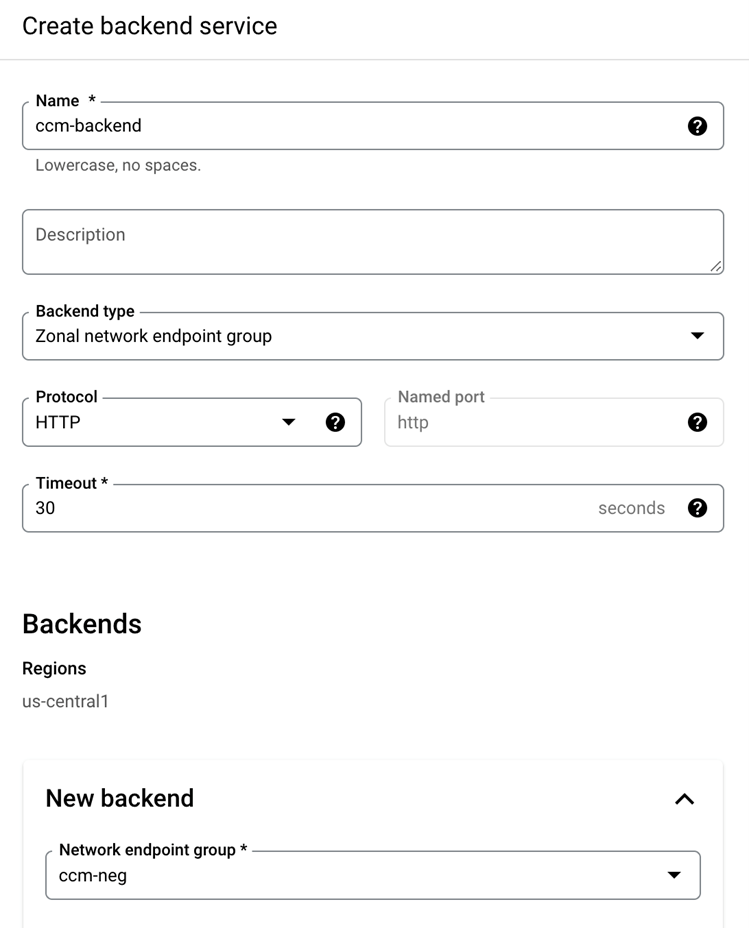
创建一个 Backend Service

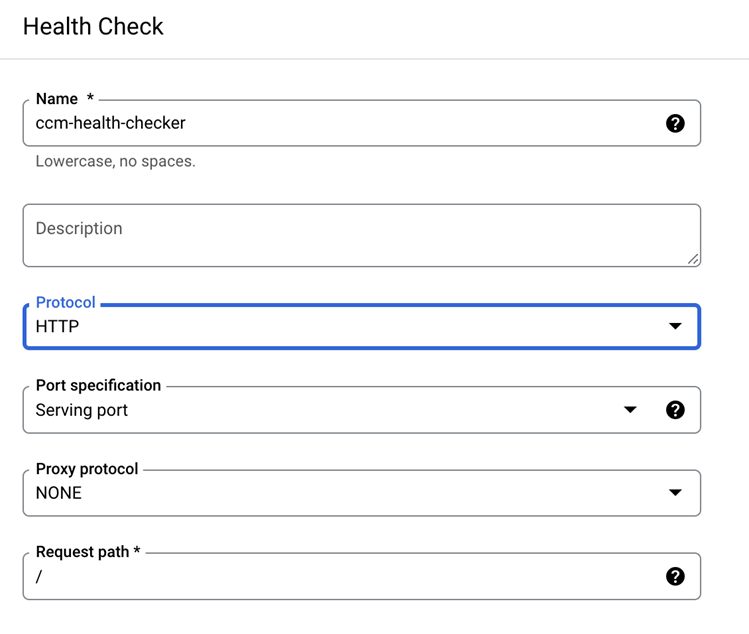
创建一个 Health Check
验证 HTTP Load Balancer
首先查询 HTTP Load Balancer 的 Frontend IP
然后访问验证
3. 创建和配置 Certificate Manager
首先创建 Certificate Manager DNS Authorizationss
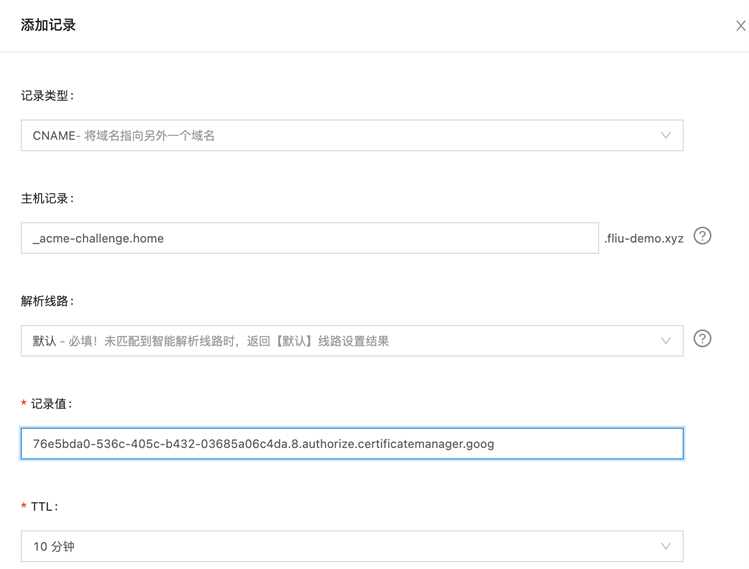
在你的 DNS 解析中添加 CNAME
使用 DNS Authorization 创建 Certificate
Describe certificate 直到状态为“Active”
创建 Certificate Maps 和 Entries
创建 Target HTTPS Proxies
创建 Forwarding Rule
域名解析给 HTTPS 增加一条 A 记录

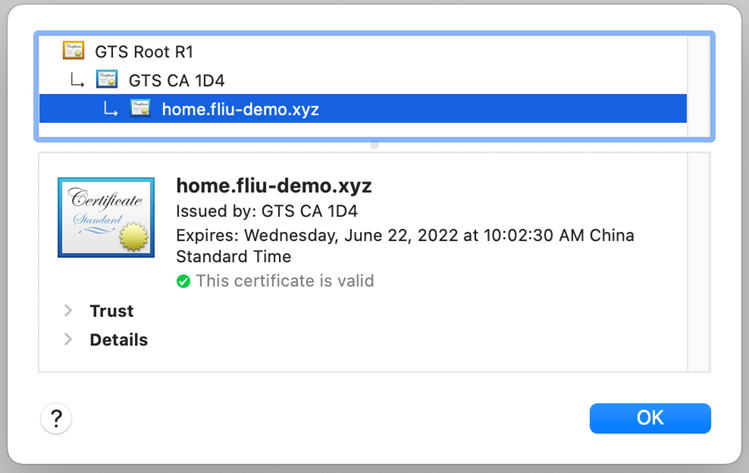
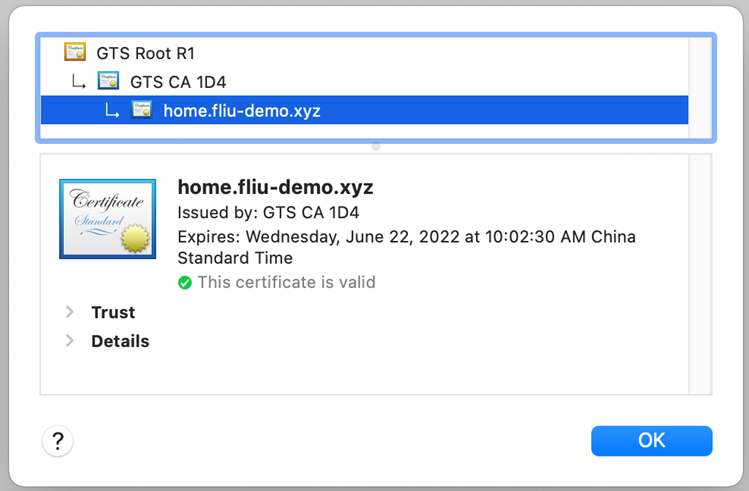
验证
4. 添加子域名证书
我们假设线上需要部署一个新的业务应用,使用子域名 hello.fliu-demo.xyz 来发布
在 GKE 上部署应用 hello 作为后端服务
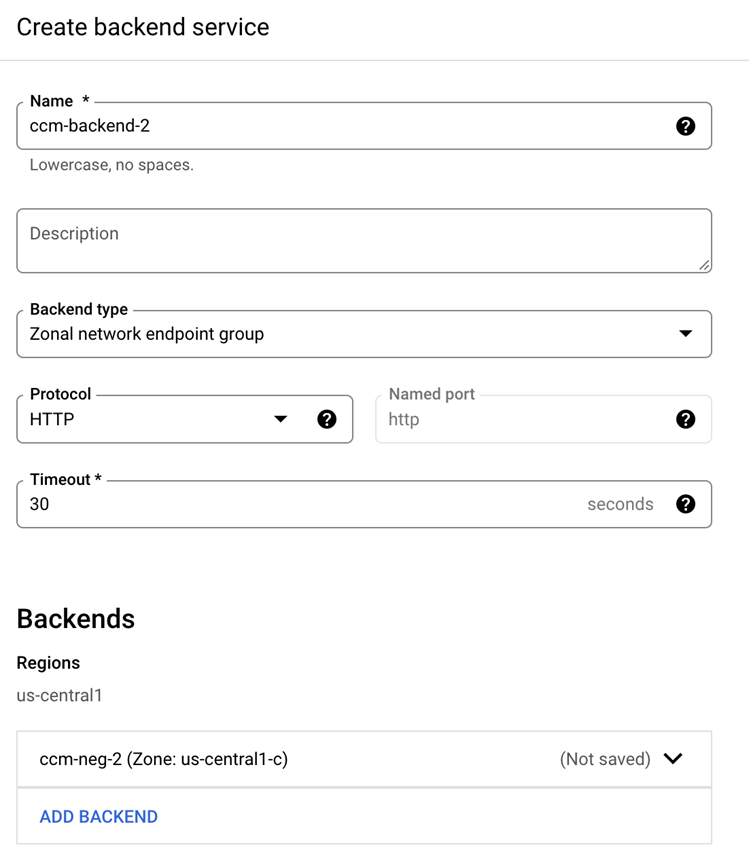
创建 Backend
为 hello.fliu-demo.xyz 添加一个新的 Backend

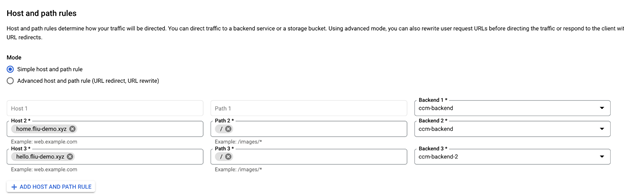
配置 Certificate
1) 再为 hello.fliu-demo.xyz 创建一套 Certificate Manager 的 DNS Authorization,Certificate

2) 我们仍然继续使用前面创建的 Certificate Map,只是添加一个新的 Entry
接下来,我们通过一个静态 ip 地址来设置多个域名的 forwarding-rule 和 target-https-proxy。
注:在此之前,你可以先删除之前创建的 forwarding-rule,target-http-proxy,target-https-proxy。
3) 创建一个静态 IP
4) 创建 target-https-proxies 和 forwarding rule
5) 为 hello.fliu-demo.xyz 添加 DNS 一条 A 记录
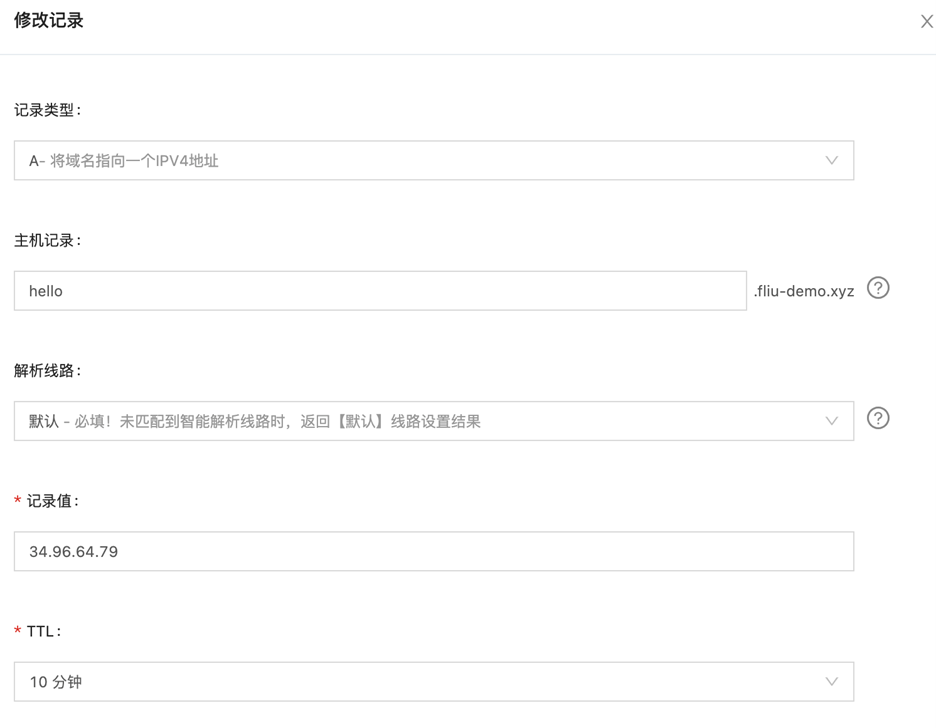
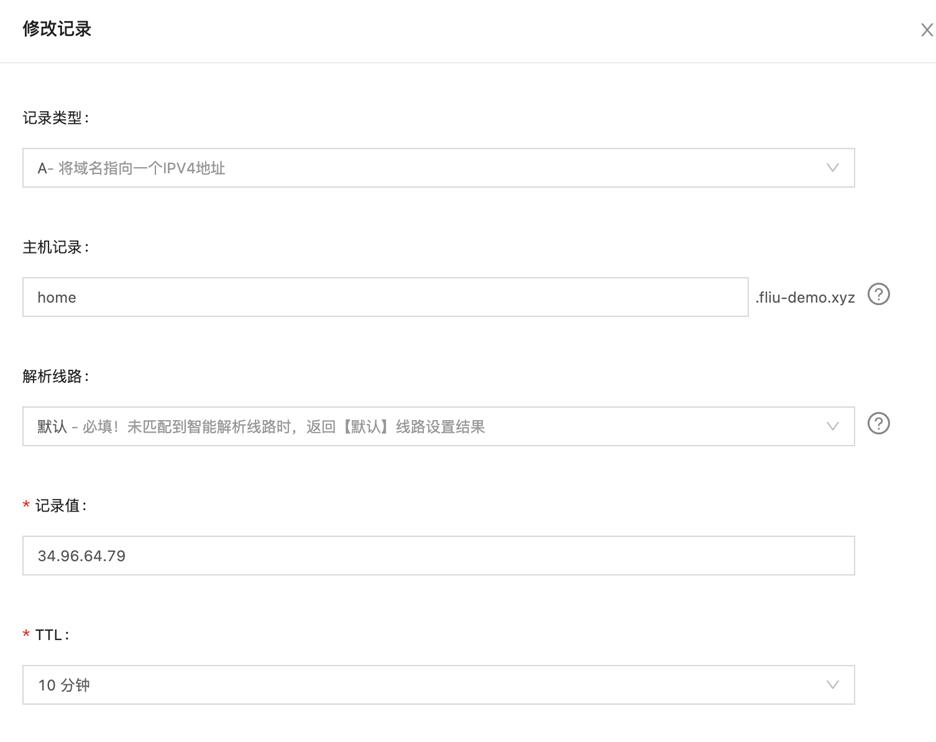
并把之前的 home.fliu-demo.xyz 的 A 记录的值也改成静态 IP 地址“34.96.64.79”
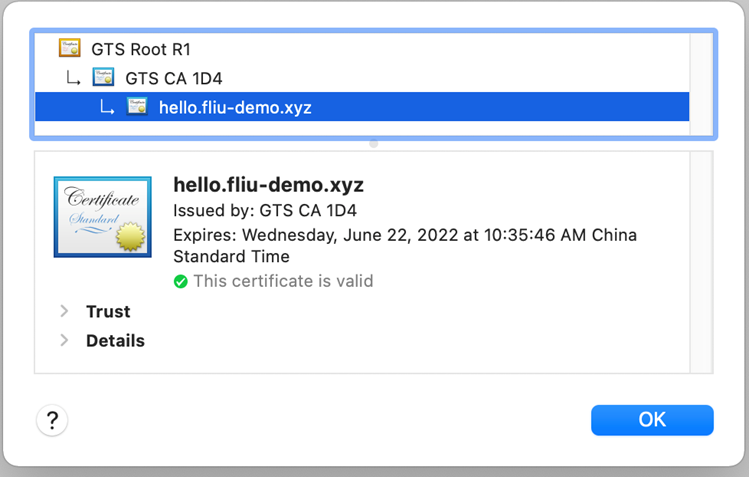
验证访问子域名
文章信息
相关推荐
精选内容

关注【谷歌云服务】
微信公众号
微信公众号
微信咨询:
周一至周五 早上 9 点到晚上 6 点
联系我们